- Configure Connected Accounts for Token Vault for a supported social or enterprise connection.
- Configure your application with the Token Vault grant type.
- Configure the token exchange for your application:
If you have previously set your MFA policy to Always in the Auth0 Dashboard, you need to set it to Never to retrieve an access token from Token Vault. Otherwise, you will receive an error. To learn more about the different MFA policies, read Enable MFA in the Auth0 Dashboard.If you need to trigger MFA challenges for interactive flows, enable Customize MFA Factors using Actions when setting up MFA for your tenant. You can then use an Action to trigger an MFA challenge based on the
event.transaction.protocol property. To learn more, read Customize MFA selection for Universal Login.Configure Connected Accounts for Token Vault
Connected Accounts for Token Vault manages a unified Auth0 user profile linked to multiple external accounts, where users can log in to any one of their accounts using a single set of credentials. Your application then fetches the stored credentials in Token Vault to interact with external APIs on the user’s behalf. You can configure Connected Accounts for supported social and enterprise connections. To learn more, read Configure Connected Accounts.Configure application
Configure your application with the Token Vault grant type using the or . Only certain types of clients can use the Token Vault grant type:- The client must be a first-party client, i.e. the
is_first_partyproperty istrue. - The client must be a confidential client with a valid authentication mechanism, i.e. the
token_endpoint_auth_methodproperty must not be set tonone. - The client must be OIDC conformant, i.e. the
oidc_conformantmust betrue.
- Auth0 Dashboard
- Management API
- Navigate to Applications > Applications.
- Select the application you want to configure.
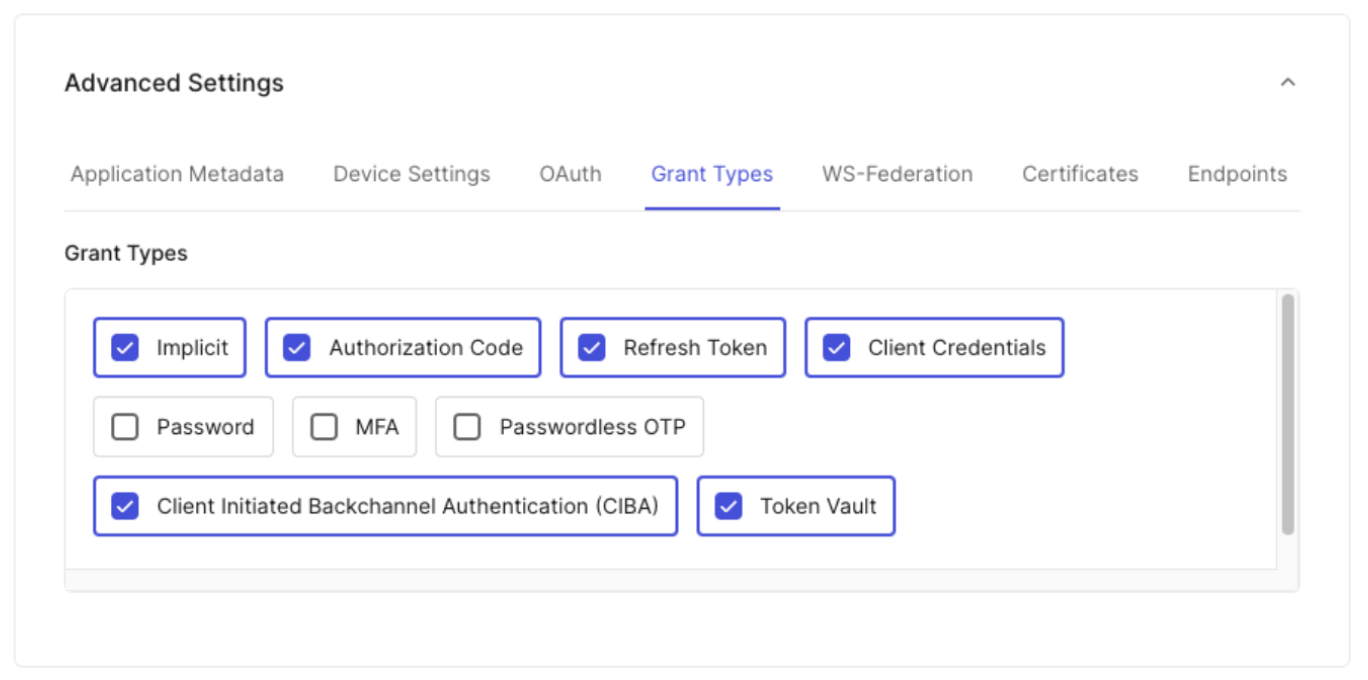
- Under Advanced Settings > Grant Types, select the Token Vault grant type.
- Select Save Changes.
Configure token exchange
To call an external provider’s APIs, your application must exchange a valid Auth0 token for an external provider’s access token from Token Vault. The type of Auth0 token used for the exchange depends on your client type and use case. To learn more, read Supported token exchanges.Configure refresh token exchange
To use the refresh token exchange with Token Vault, you need to configure your application with the following grant types:- Authorization Code: Enables your application to perform the initial user login, where your application exchanges a temporary authorization code for an Auth0 access token, refresh token, and ID token.
- Refresh token: Enables your application to use a long-lived Auth0 refresh token to request a new Auth0 access token without requiring the user to log in again.
- Token Vault: Enables your application to exchange an Auth0 refresh token for an external provider’s access token stored in the Token Vault.
- Auth0 Dashboard
- Management API
To configure your application for the refresh token exchange:
- Navigate to Applications > Applications.
- Select the application you want to configure.
- Under Advanced Settings > Grant Types, select the Refresh Token, Authorization Code, and Token Vault grant types.
- Select Save Changes.
Configure access token exchange
To use the access token exchange with Token Vault, you need to:- Configure your SPA with the
authorization_codegrant type. - Create a backend API that the SPA can request an Auth0 access token for by specifying it as the audience.
- Create a Custom API Client that is linked to the backend API with the Token Vault grant type enabled.
Configure your SPA
Configure your SPA with theauthorization_code grant type. This enables the SPA to request an Auth0 access token scoped to the backend API from the Auth0 Authorization Server.
- Auth0 Dashboard
- Management API
To configure your SPA with the
authorization_code grant type:- Navigate to Applications > Applications.
- Select the application you want to configure.
- Under Advanced Settings > Grant Types, select the Authorization Code grant type.
- Select Save Changes.
Create backend API
Create a backend API with a unique identifier and the desired scopes that will perform the access token exchange with the Auth0 Authorization Server.- Auth0 Dashboard
- Management API
To create a backend API in the Auth0 Dashboard:
- Navigate to Applications > APIs, and click Create API.
- To create your API, follow the instructions in Register APIs. Note: Once you set an identifier for your API, you cannot change it.
- Click Create.
- Once you’ve created your API, you need to add scopes for the API. Navigate to the Permissions tab. Under Add a Permission, add your scopes.
Create Custom API Client
For the access token exchange, you need to create a Custom API Client linked to the backend API. The SPA will be able to request an access token to the backend API by specifying it as the audience in the authorization request to the Auth0 Authorization Server. The Custom API Client has the same identifier as your backend API and has the Token Vault grant type enabled. When the backend API performs the access token exchange, it authenticates itself by passing the Custom API Client’s credentials to the Auth0 Authorization Server, proving that it is the same entity that was registered in the Auth0 Dashboard.- Auth0 Dashboard
- Management API
To create a Custom API Client in the Auth0 Dashboard: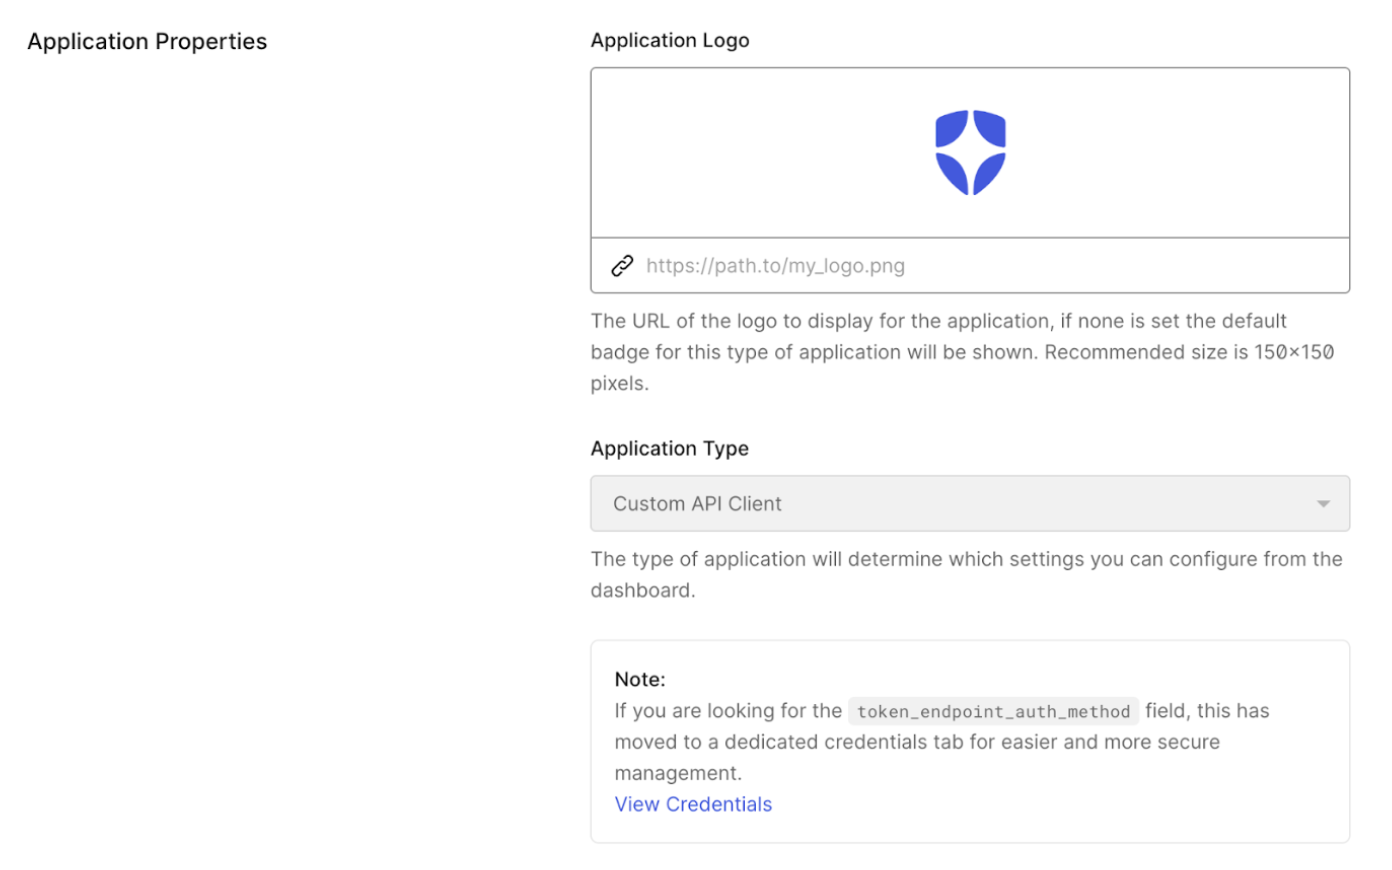 Once you’ve successfully created the Custom API Client, the user will be redirected to it instead of the SPA after logging in.
- Navigate to Applications > APIs and select your backend API.
- Select Add Application and enter an application name.
- Click Add. Once the application has been successfully created, click Configure Application and scroll to Application Properties. The Application Type is a Custom API Client.
- Under Advanced Settings > Grant Types, the Token Vault grant type should already be enabled for the Custom API Client.